So yes, in fact the LFOTool Plugin is outside the Ableton Effect Rack, so the Macros in the effect rack are not triggering LFOTool, I should have seen this the first time.
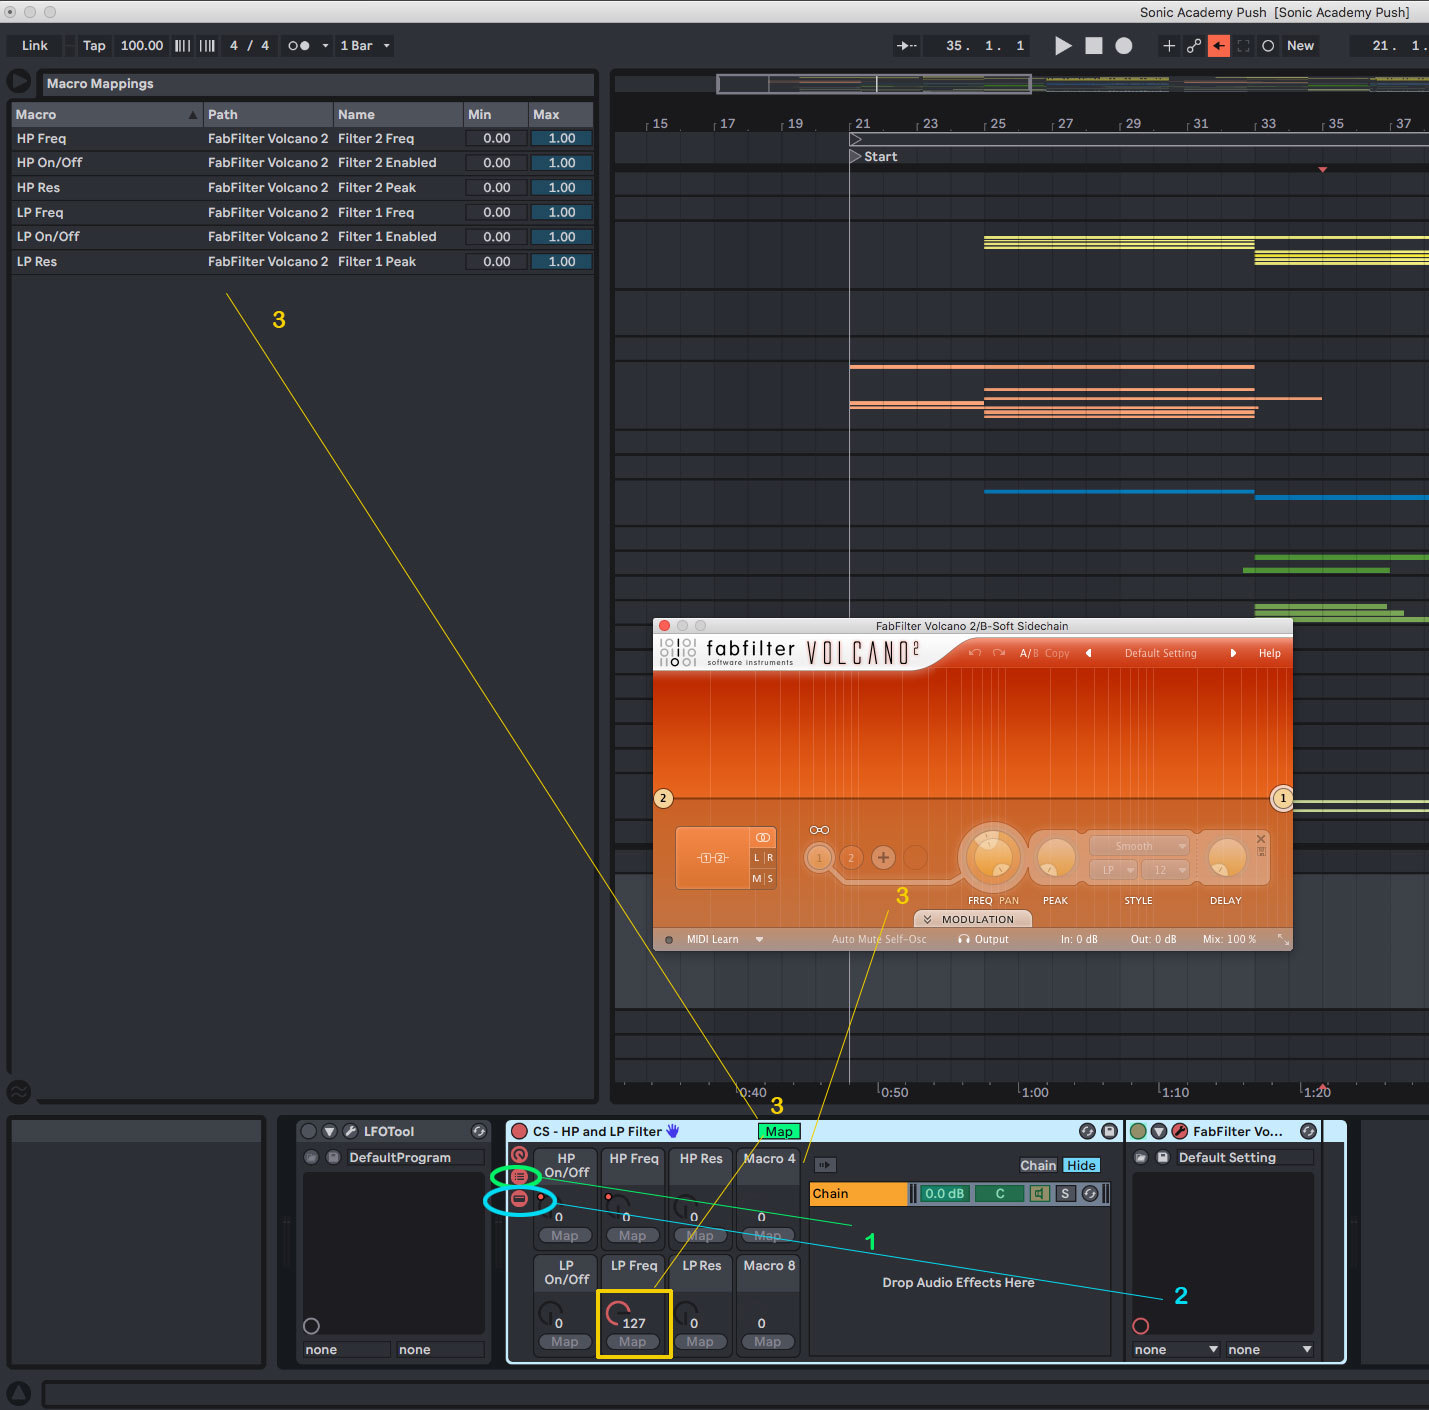
When you click on the 2nd icon on the right side of the rack ( 1 - highlighted in green ) it will expand the rack and reveal the chain(s).
Clicking on the 3rd icon ( 2 - highlighted in blue ) reveals the devices contained in the rack, in this case CS is using FabFilter Volcano 2 plugin and that’s what the Macros are linked to and if you click on the “Map” button at the top of the effect rack, it will reveal the Macro Mappings in Live’s inspector ( everything 3 - highlighted in Yellow ).
So that’s what this filtering rack is doing, I don’t know if you have Volcano 2 plugin to check this out, if you don’t you could try to use another filter plugin or Ableton’s native “Auto Filter” to try to replicate.
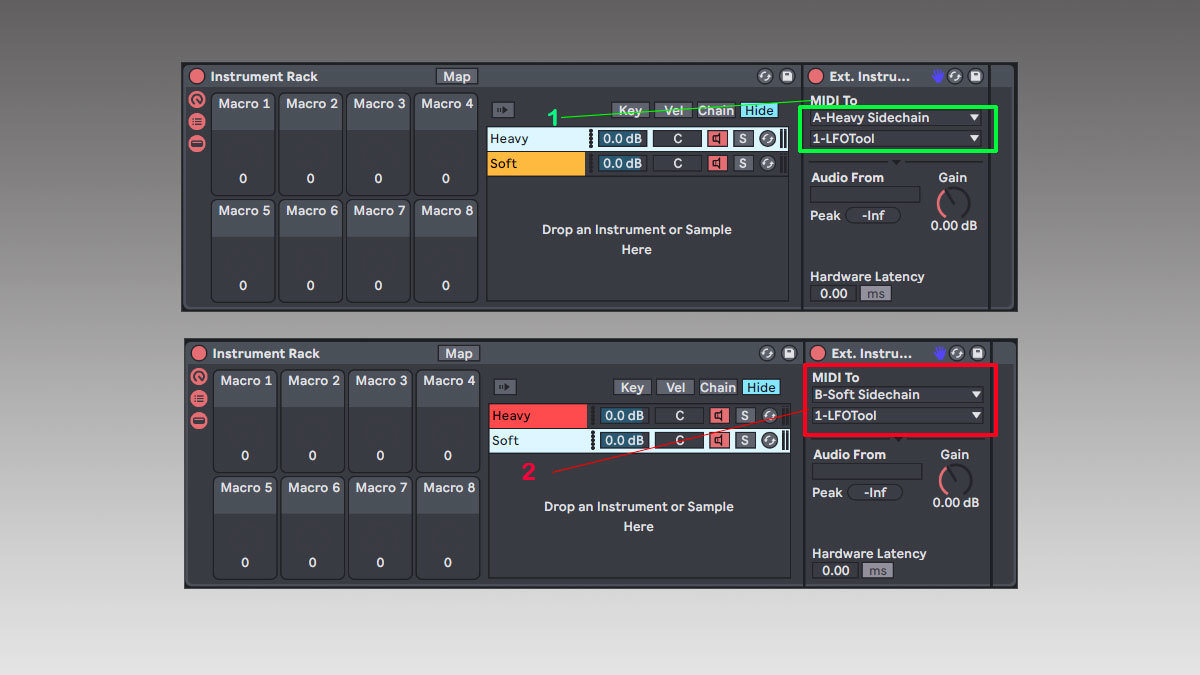
So that’s how the filters are set on those Side-Chain effects return tracks in Live. Now to trigger either the “A-Heavy Sidechain” or “B-Soft Sidechain” CS is using another Effect Rack inside the “SIDECHAIN TRIGGER” track as you mentioned. Again, if you expand the chains, you can see that he’s using 2 different chains with an “External Instrument” device on each one linked to the LFOTools plugins either on return Track A or B and the automation lines are controlling which one is triggered. Since all effects chain are processed from Left to Right before reaching the output, in each case it will then go 1st to LFOTool and then the following Effect Rack on return A or B.
So that’s the principle, again I haven’t watched the tutorial myself, so it’s hard to go into details and it’s quite a complex routing, the benefit is that he’s able to control different sidechains effects with automation.
Hope this helps to better understand the principle & routing, but yes, its quite an advance way to do it, so it might take some trial & error to replicate.
Thanks for this very detailed response. Yes I believe I’m understanding this better. So in order for me to completely replicate this sidechain, I would also need to set up the Effect Rack and map it like how they did basically how you explained with Fab Filter Volcano 2 or try to use “Auto Filter” plugin.
With my setup, the sidechain only processes through the LFO tool but no effect rack since I don’t have an effect rack on my sidechain track.
That’s probably what’s causing it not to sound right I think, right?
Also, by looking at how the mapped the Fabfilter Volcano 2, do you know what the mapping is doing to the sidechain or what’s the purpose of mapping the effect rack like they did? I’m not sure.
Thanks again for your help, it was definitely insightful.
Yes that’s the reason why it doesn’t sound right, because you’re not using the HP & LP filters during the sidechain.
Looking deeper into this, I’m not sure you’ll be able to replicate the same behavior with Live’s Auto FIlter :
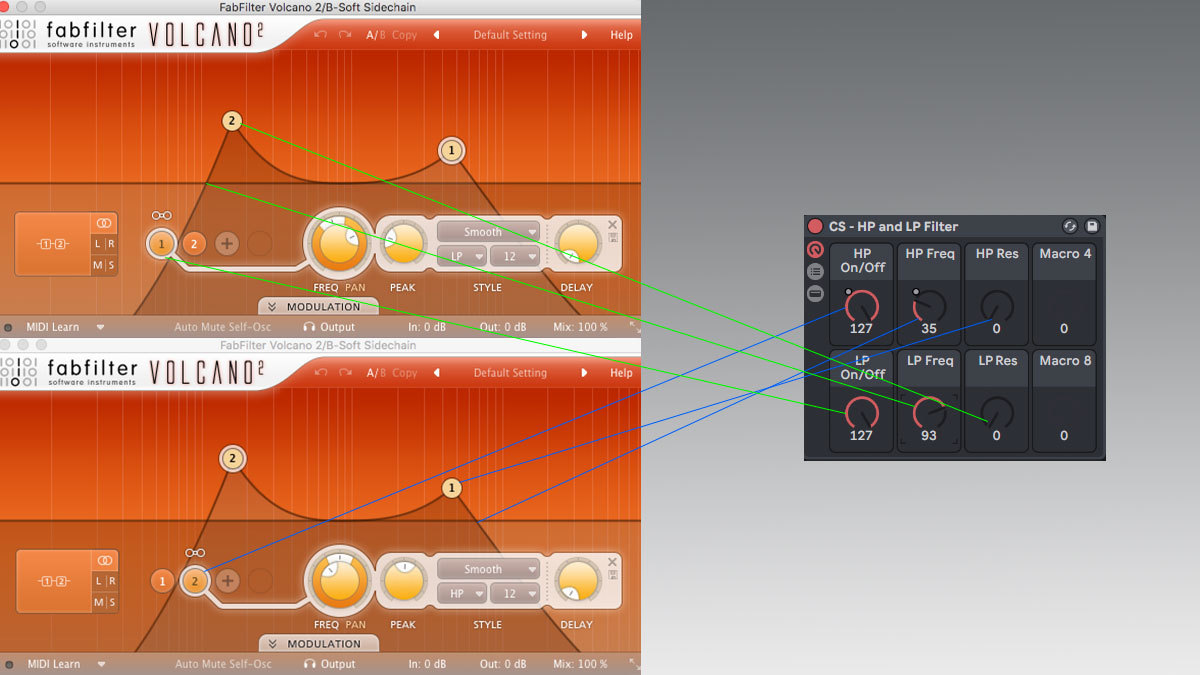
Basically there’s 2 filters running at the same time inside Volcano 2, a High Pass & a Low Pass filter, they are used in LR ( stereo mode ) and they are “linked”, so controlling one parameter like the filter resonance will be equally reflected on both HP & LP filters.
Now the problem is that you can’t use 2 filters at the same time in one instance of Live’s Auto Filter, you will need to use 2 instances in your effect rack and could automate the On/OFF, Frequency Filter and Resonance for each one, but I don’t think you’ll get the same result since those 2 instances will be processed in series ( from left to right ) and not really linked.
So it won’t give the same results, I’m not sure about an alternative to Volcano 2, there’s a lot of filter plugins out there, even free ones, but don’t know about one with this L/R linked mode.
That’s as far as I can go with this one I think, have you been through all the videos yet ? Because I’m surprised it’s not explained better. Also, keep in mind that many times you won’t always be able to replicate the exact same workflow as the tutors, just because you won’t have the same plugins doesn’t mean that there’s nothing to learn about it. What’s important to get from tutorials is what the tutor tried to achieve and you might find the method interesting or not and come up with another solution as well, which is also a very good way to learn. Of course, you could decide to purchase the missing plugin, but let’s be honest, if you choose that road, it’s no good for the budget and it’s also not the best way to progress IMHO.
Sorry for the delayed response! I read your response over the weekend and was going to respond later, but completely forgot. Thanks for all this and got it!
I still have maybe 1.5 vids left to go! I’ll let you know if he dives deep into the sidechain as we spoke about.
Very true. I may take a look into trying out different methods of side chain and see what works best for me.
Thanks again for all the help. It was much appreciated and I’ll keep you posted if he does go over that part!
This is 75% tutorial, 25% advertisement for Sonic Academy plugins. If this were a free tutorial, I wouldn’t mind as much, but I already paid you for the tutorial. It’s annoying that SA still chose to push their plugins down my throat.
If I’m paying for a tutorial, I expect the tutors to use the plugins they usually use. I’m paying to see what they do, and how they do it. I’m NOT paying to make a song using Sonic Academy plugins.
Aaron clearly doesn’t use ANA regularly, and was forced to use it for this tutorial.
I also understand the desire to use stock plugins so they could give the project file away as a value-add, but I don’t use Ableton, so what good does the project file do for me? I’d rather see Aaron use the plugins he actually uses.
All in all this is a good tutorial, but Sonic Academy held it back by not allowing Aaron to use the tools he actually uses for Crystal Skies productions.
We ask tutors to use stock plugins first then ANA 2 rather than Serum / Sylenth or other 3rd party synths as a large proportion of our community has it.
Ana 2 is a much cheaper alternative to serum or sylenth or many other 3rd party plugins… it’s the reason we made a synth in the first place was to give users a cheap alternative and a single powerful synth that if needed in a tutorial the might have. Rather than having to watch videos that might use a bunch of random ones.
Loved this one, this is my second watch through. Only thing that I’m finding with a few tutorials I’ve watched, rarely does someone mention how many bars the different sections are. That’s kind of a source of confusion for me. I know the intro bit is 8 bars, but after that I kind of get lost. I’ll try to watch through a gain to figure it out.
Wanted to drop in and add that I’m working in Studio one, otherwise I would’ve loaded up the Ableton project, of course lol. But realized there are stems available, which is awesome! I downloaded those and was able to navigate my arrangement question that way.
Glad to read that you managed to find a workaround for this, and BTW, it’s a very good practice, that’s exactly what I attempt to do in the same situation but it’s also an excellent way to deconstruct full tracks for reference and learinging about song structure & arrangement.
So that’s a very useful tip & feedback for others, thanks for sharing
I’m wondering, are there any courses that focus solely on creating the type of fills and transitions he’s using in the drop? lol I don’t have such an extensive library of fills to draw from but it’d be cool to learn how to develop them so I can build out my toolbox
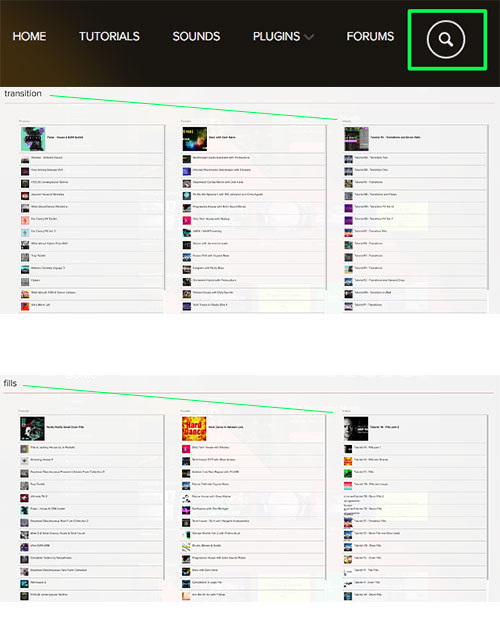
There are many different ways to create fills & transition actually Not sure about a dedicate tutorial, but you can use the keyword search feature from the main site ( clicking on the top-right page magnifier icon ) and use a keyword like “transition” or “fills” for example and it will populate the matching results. You’ll find many videos from full courses showing you how different producers approach this.
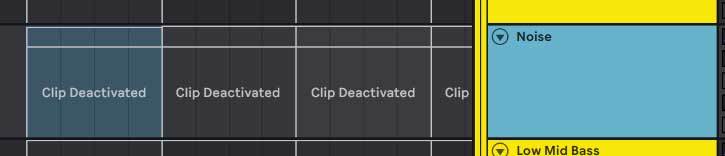
I think this is just a noise audio sample used in serum rather than a preset and the track is also deactivated in the final Ableton project file, so not sure how exactly it was used in the end, should be explained in the video tutorial though.