we’ve noted all this and will take a look at them - right now we have a 1.0.1 release that fixes some more major stuff such as the GUI issues and preset crashing. The above stuff will most likely not make its way into this particular release (although we have fixed some of the gate stuff and the ms readout)
1 Like
Hi Brian,
Wow!! Looking forward to the 1.0.1 release, with just the ms corrected would be a god send!
Thank you for working on this guys, greatly appreciated :o)
Cheers,
Aron.
Hi Phil and Bryan,
Thanks for the alt+click tip and thanks for considering the ideas and suggestions!
Alistair
This is what I am experiencing yes, a 3dB attenuation on the output.
However, I also have a preset that is 0.65 dB over zero and can’t for the life of me find wat’s boosting it! Limiter, distortion and eq are all turned off!
Cheers
Ady
Scorb / TRK Mastering
1 Like
Cheers for that Ady, by the way Update 1.0.1 is now available :o)
Really happy with the update:-
The display shows exactly what I would expect, and I can’t believe how fast they turned it
around. Rapid customer support from a company who truly believes in there product.
Well done Bryan and team :o)
2 Likes
Just to recap guys and address some of them
Bugs to be investigated
- Normalised clicks not displaying waveform at 100% view
- Tail of Amp Env inconsistent (This may have been addressed in 1.01)
- Discrepancies with curve drawing when zooming horizontally - confirmed
RE: Output volume set to 0db but metering at -3db
(We use the -3db Pan Law which is -3db at centre, and 0db at the sides - the alternative is a compensated pan law which is 0db at the centre and +3db at the sides, we can’t really change this as it would affect volumes pushing into the EQ / Dist / Comp / Limiter etc)
Requests
-
Volume lock to keep volume locked between changing presets -
(I’m not sure how this one would work, as preset volume is dependent on a lot of factors i.e. click volumes, limiter settings, distortion settings / compressor makeup etc.) -
Ability to type in specific values for each node
-
Ability to type in Length and Pitch (X/Y Axis)
-
Ability to select and drag several nodes at once
-
Ability to adjust visual height of click overlay in click view area
-
Amp Env bypass
-
Switch between Log and Lin
(This most likely cannot be achieved - a bezier curve drawn in LOG would look completely different when converted to LIN)
There’s a couple other requests i need a bit more clarification on
- waveform graph same length as curve
- Apply pitch knob value to curve
The inconsistent tail issue is much improved but is still there, just at the very end of the kick now, so is less noticeable. At least the auto fade is gone now though! ![]()
The biggest issue with the waveform not matching the curve, is that when you are zoomed right in, you can’t see the portion of the kick waveform you want to work on!
It kind of defeats the purpose of being able to zoom in. The only solution I can think of is to have separate zoom for the curve and waveform and some kind of highlight or greyed out node on the waveform that represents where the currently edited node is in relation to the waveform. Either that, or an option where selecting / adjusting a node, re-centres the waveform to that point so you can see precisely where on the waveform your node relates to.
At the moment it’s just not workable.
Only the very first fraction of a ms can be edited and viewed simultaneously at full zoom!
One other click option I would like to see is a shift function, so that you can move the click on by few milliseconds if necessary. It would definitely complement the time start parameter for finding sweet spots in alignment.
Regarding clarification about applying the pitch knob to the curve. If the pitch knob is essentially performing the same function as dragging the pitch slider up, is there a way of applying the pitch knob’s setting to the slider? Would be quite useful! ![]()
Cheers
Ady
Scorb / TRK Mastering
Hi Bryan,
Ah, pan law, that would account for the -3dB, I agree that it makes total sense :o)
I have an idea: the volume controls on the clicks/sub could be used determine the amplitude of the displayed waveforms.
Cheers,
Aron
I agree with this Ady. Metrum has a Lin/Log switch on its display, and while it does look weird in log mode, it really helps in some cases. It would be nice to have the option to do so, hidden away in settings for example :o)
Cheers,
Aron
Hi guys!
Thanks for the update!
I’m going to agree with Ady and Aron that the way the waveform and amp envelope are visualised is rather important to make precise sound design. Basically any point of the amp curve on the X-axis has to correspond with the waveform view so that the waveform dips exactly where you dip the AMP curve. That is what is meant by “waveform graph same length as curve”. VPS Phallanx works like this. (I have never used Metrum).
Vengeance do it by having a “dual zoom” as Ady suggests. Adjusting the envelope in length resizes the waveform and you can also zoom in and out with the scroll wheel button on your mouse.
Here are two screen captures that demonstrate how this works in practice. (Once with the grid in milliseconds and once in Sync mode so that the grid displays note fractions):

- The forum doesn’t like me posting two images in one post so I will put in in a follow-up post.
Note that the waveform, amp envelope and grid markings are always in linear and direct sync with each other. It really doesn’t matter whether the wave form is elongated or shortened or not. (One can always use a scope after the plugin to check the actual waveform). What counts is this direct mapping between amp envelope, time grid and waveform. That makes it quick and practical to use.
If anything is not clear or you need any more screen captures, feel free to ask!
Ady is spot on with his interpretation of my slightly cryptic “Apply pitch knob value to curve” request. ![]()
As for the volume lock button request, the way I see it, all the sounds I make (and I would suggest the same to others), should end up at more or less at the same final level. Say around 6 dB or so shy of full scale. To me this follows tried and tested traditional gain staging approaches to sound design and mixing.
One of the great advantages of this is that you can select a sound, say a kick drum, set the output level so that it fits the tune you are currently working on, lock the output volume and then cycle through the factory presets and self created sounds to see how they fit in the tune.
Doing it at the instrument level rather than the track level has the advantage that any subsequent processing still more or less works. (Think compression, saturation, feeding the side-chain of a compressor on another track, boosting with an EQ etc etc). This is great to quickly find the appropriate sound for a tune before you start fine tuning it.
I hope I (and others) are not sounding too demanding. I am already enjoying using KICK 2 but I think these kind of tweaks would bring the plugin to the next level in terms of usability and especially the speed at which we can get stunning results.
Thanks for reading and considering all this! ![]()
Alistair
1 Like
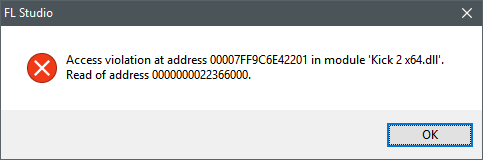
Just downloaded the new version and it still crashes on plugin switching… First time I got the crash from before… This time I got this error. FL12.2 win10 x64
Reinstalling fixes it… (for now)…
Here is the second image. (Had to wait to become a “Basic User” to post more than 3 times in the thread).

PS: If you click on the animated images you will see them in more detail.
Cheers,
Alistair
Hello all,
I have a question/feature request. Is there any way to choke a kick by playing it again? I couldn’t find this in the manual, so I’m guessing it’s just not implemented yet. It would be nice to have for kicks with a longer sustain so two played in a row don’t overlap too much.
You can do this by using the GATE function. The kick will only play for the length of your midi note !
1 Like
Perfect! I was wondering why I couldn’t find the controls to edit the gate threshold, haha… now I know. Thank you!
Freaking AWESOME plugin by the way. I’ve never done drum synthesis before, but I’ve dabbled in many other forms of sound design. This plugin makes it so easy to get the sound I want quickly. Love that harmonics editor, and the fact that I can just import all my foley samples into the user clicks folder
1 Like
Feature Request:
It would be useful to have separate EQs, one for Click 1, one for Click 2 and one for click 3 then an Eq for the Sub and the already included EQ as Main EQ.
1 Like
I love the ability to Render the Kicks and drag them straight into my Arrange view from the Plugin. One thing I have noticed however, is that if I have Keytrack turned on for the click and have the click an octave or two higher than the sub, when I render or export the file, the click gets rendered in the same key as the sub. For example, if I render the Kick at C1 and have the click at C2 using Keytrack, the click gets moved to C1 as well for the Render.
Is this expected behavior or a bug? If you aren’t able to pickup the key of the click from the DAW during render, can you add an option to specify the key for the click (in addition to what is already there for the sub?
Thanks.
I the render View you can specify the note to be rendered… typing a value in is currently buggy… but if you click and drag it should work ok.
Also remember you need to hit the generate button every time you change something.