@CtrlAltDel
Sorry for late reply, weekend’s been busy here 
Intro fix & fuller Mix : don’t know which technique you used to filter sounds and bring them into the mix. If it’s volume automation it’s better to use a utility plugin on each channel than doing it on the channel fader.
There’s a great tut by Protoculture to learn how to get wide sounding mixes here.
How To Create Wide Mixes with Protoculture | Tutorial 01 - Introduction
Bass & arrangement : Especially in this genre of Trance, the bass & synths are very much following a kind of staccato pattern, playing in & out following a rather dynamic arrangement with a lot of drops and taking out elements by removing some kicks at the end of some bars, removing the synth/bass and playing nothing or just some effects like noise risers or percussive drops. In your mix it sounds more like playing back the same loop, it’s not very catchy for the listener IMO.
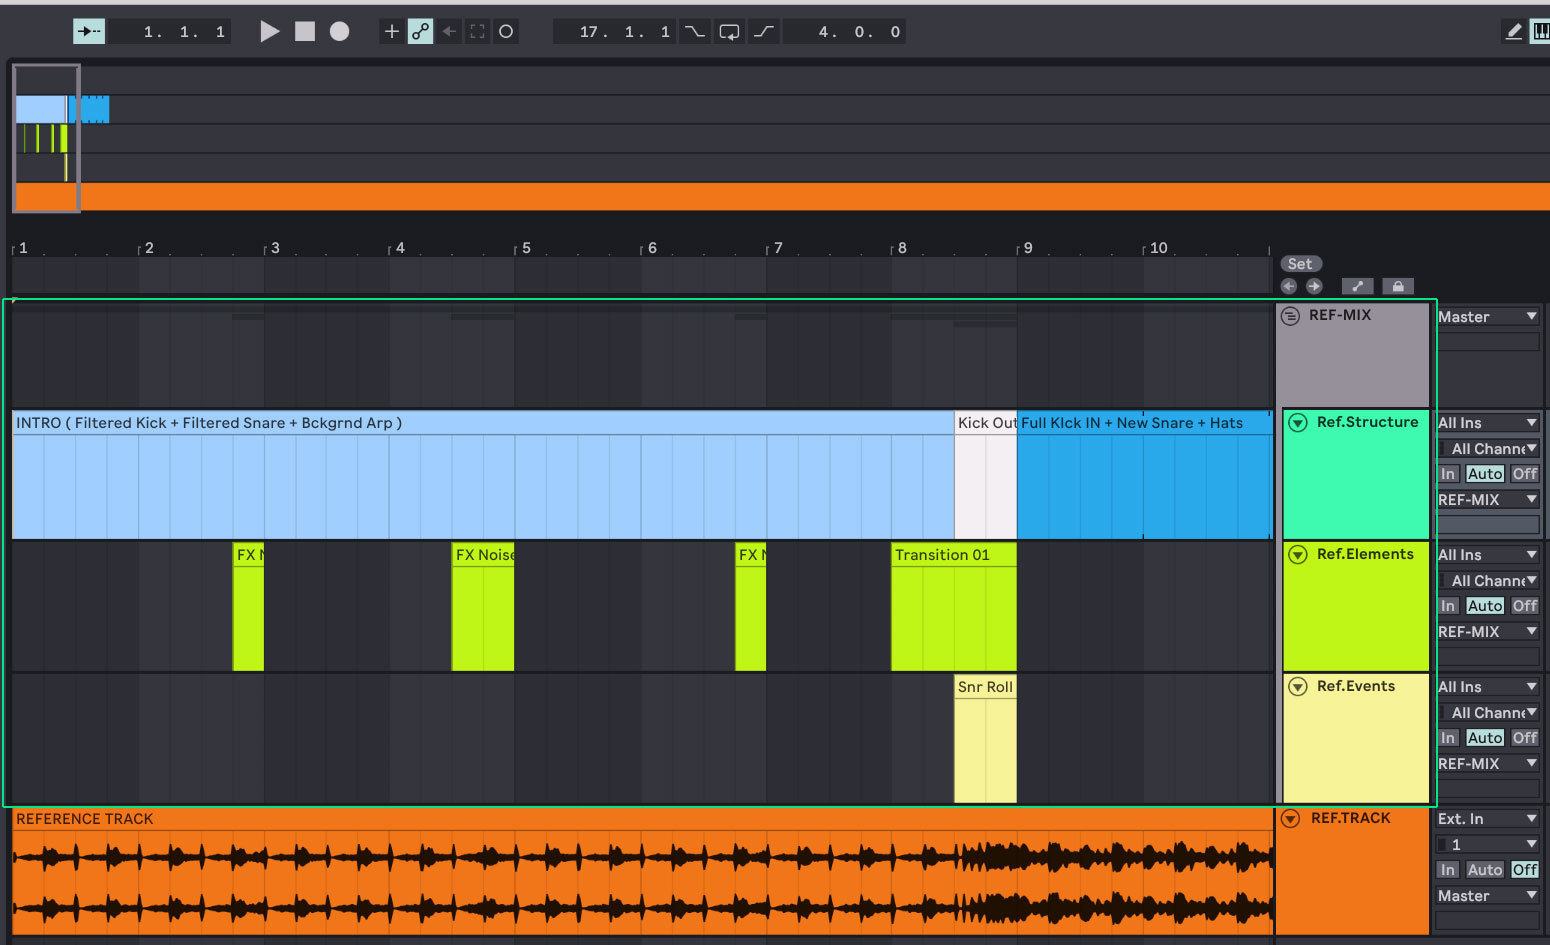
You can deconstruct an existing track in Live by loading a reference mix onto one audio channel and zooming in, then playing back by bars and use Live Markers function or ( better IMO ) using Midi channels in a Group above the audio track and put in empty Midi clips matching the reference tracks structure, elements, detailed content… You can color code the Midi regions according to tension, energy and content, it makes it very visual & handy. Zooming really hard you can use even put midi notes inside those clips matching the audio event you’ll see in the waveform and placing snares, claps, percs, fx…etc.
It takes some time to do in the first place but it’s a good way to mimic an existing arrangement and to get a song structure before working on a remix instead of starting with an empty canvas.
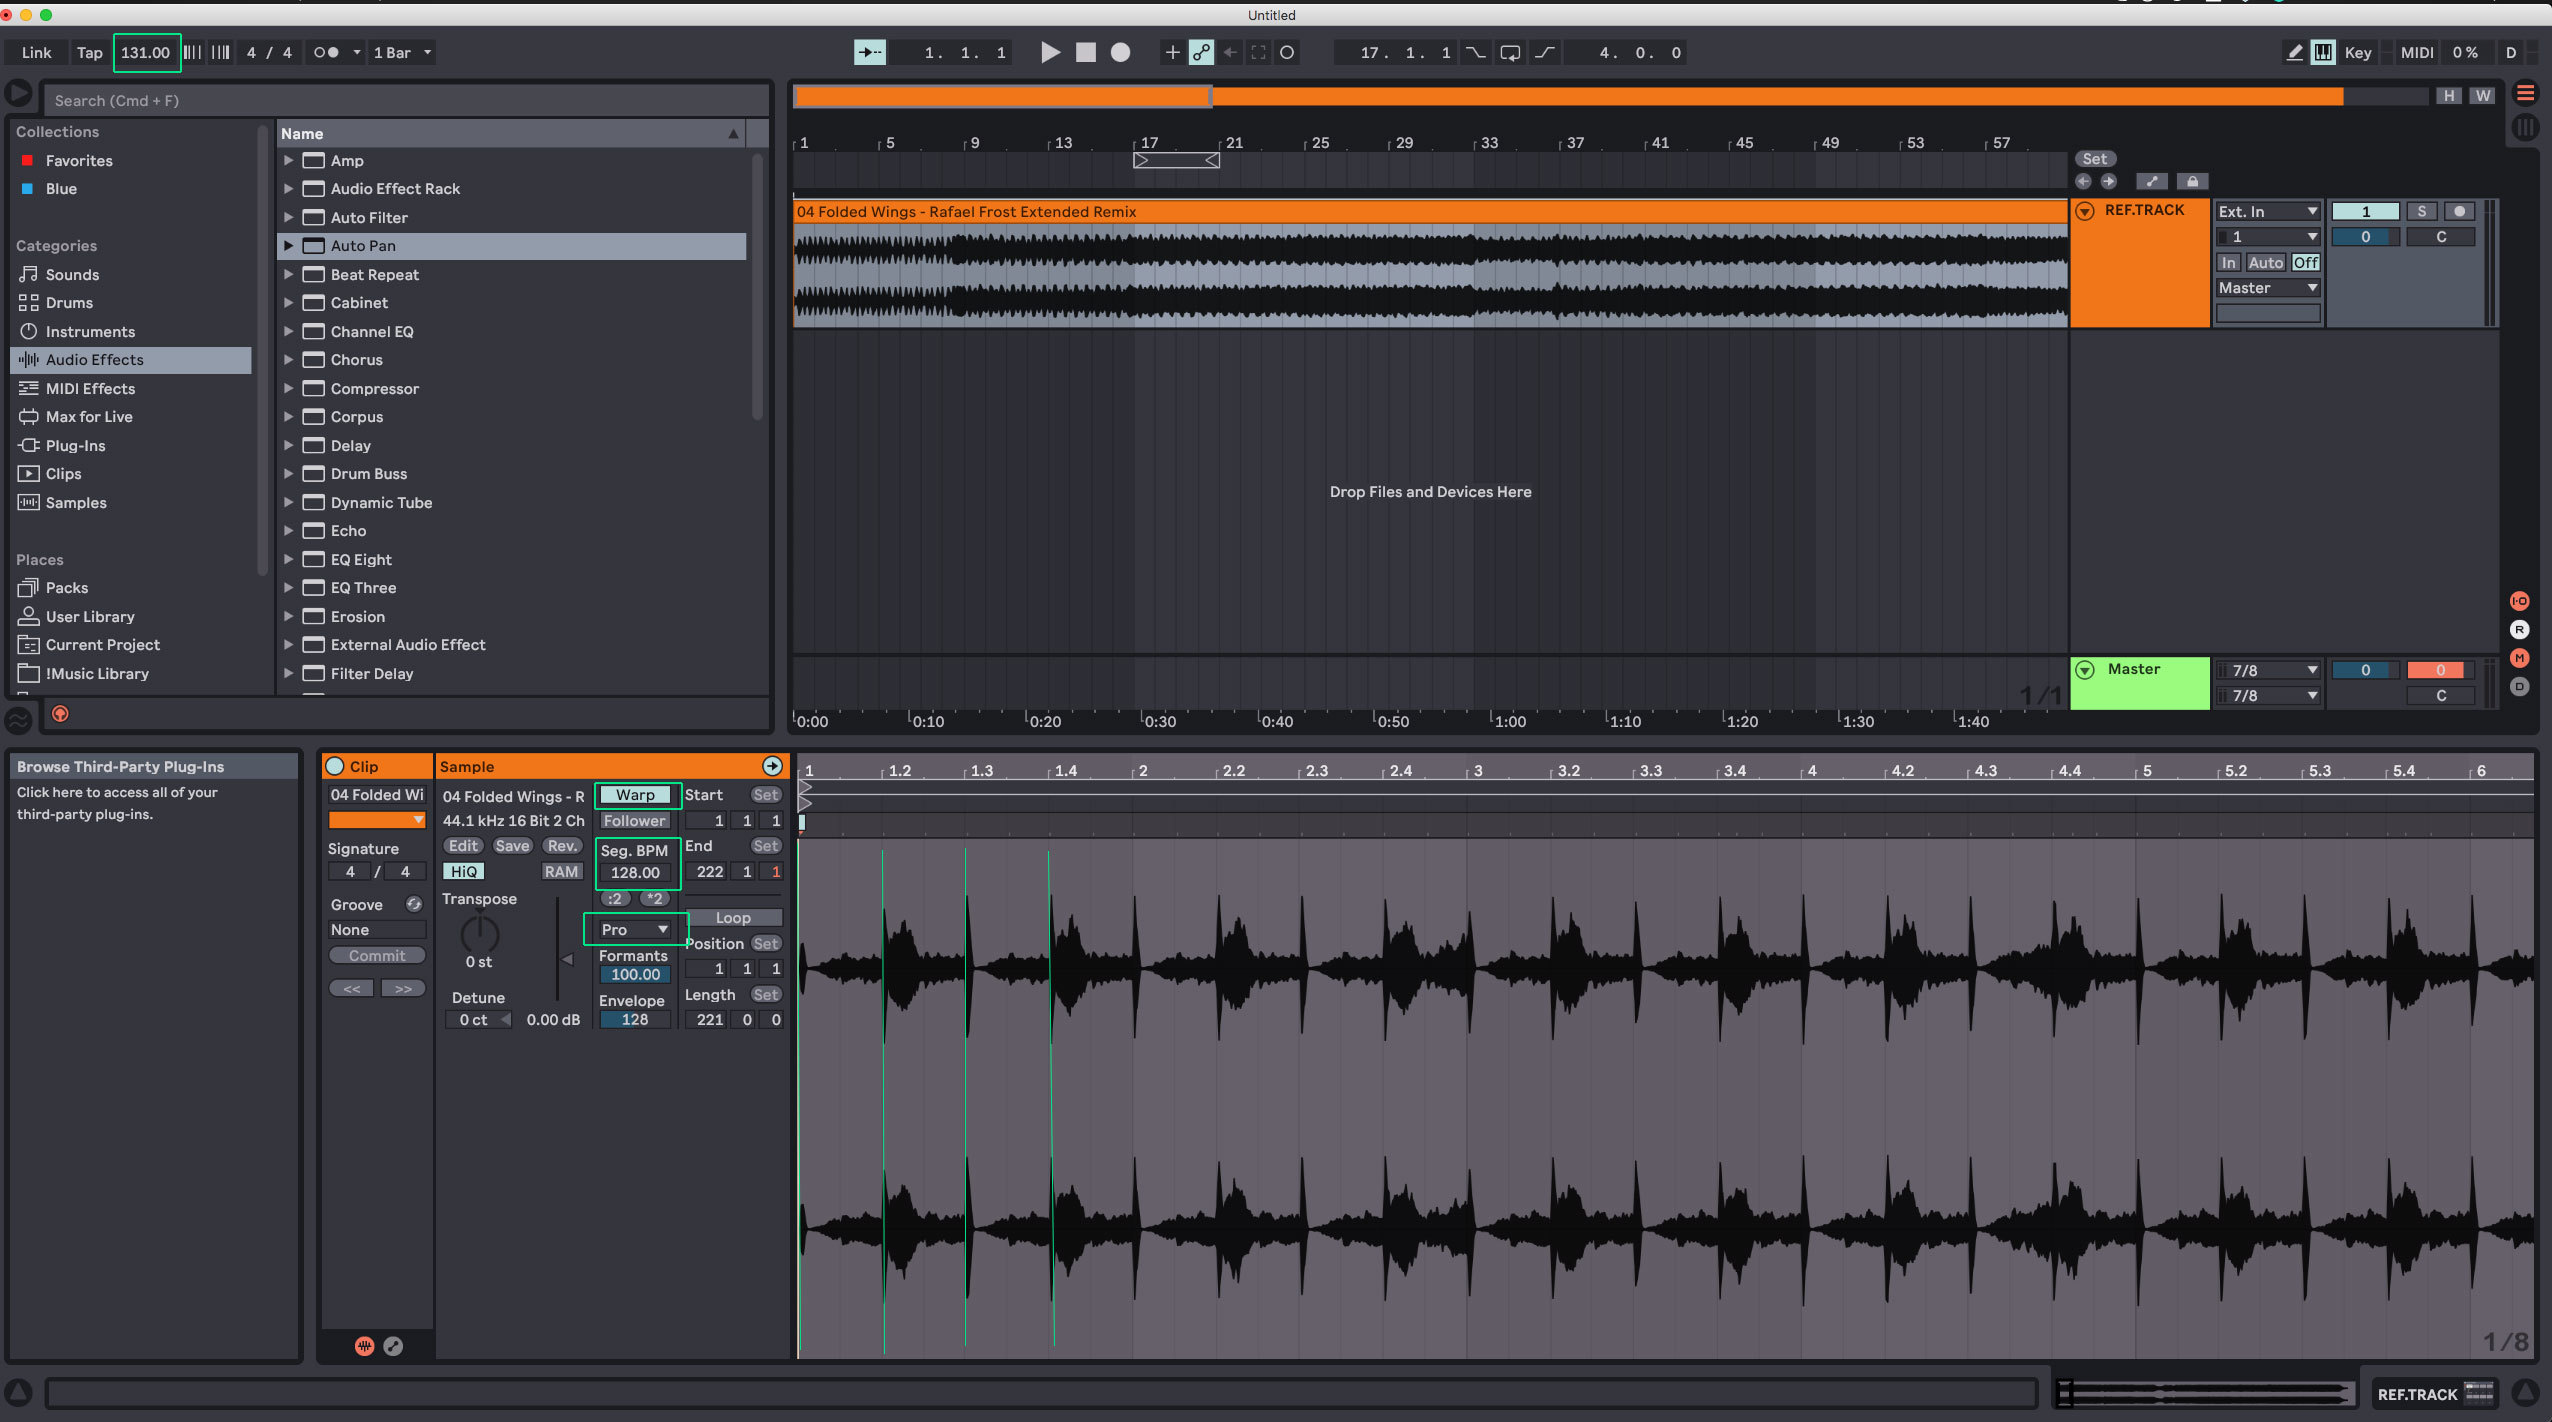
To be able to change tempo easily and have the reference track matching it, open Live, set your tempo to the desire one of your remix, load the reference track on an audio channel then double click on it, set the playback algorithm to “Complex Pro” and enable “Warp” and set the ref.track tempo to it’s original tempo in the warp parameters. Once done, zoom in onto your ref.track and check if it’s correctly aligned with Live Tempo. Make sure your ref. track is starting playing at the correct point ( no empty or noise part playing before the real track beginning ) → you can right click on the audio clip time line and use the SET 1.1.1 Here function.
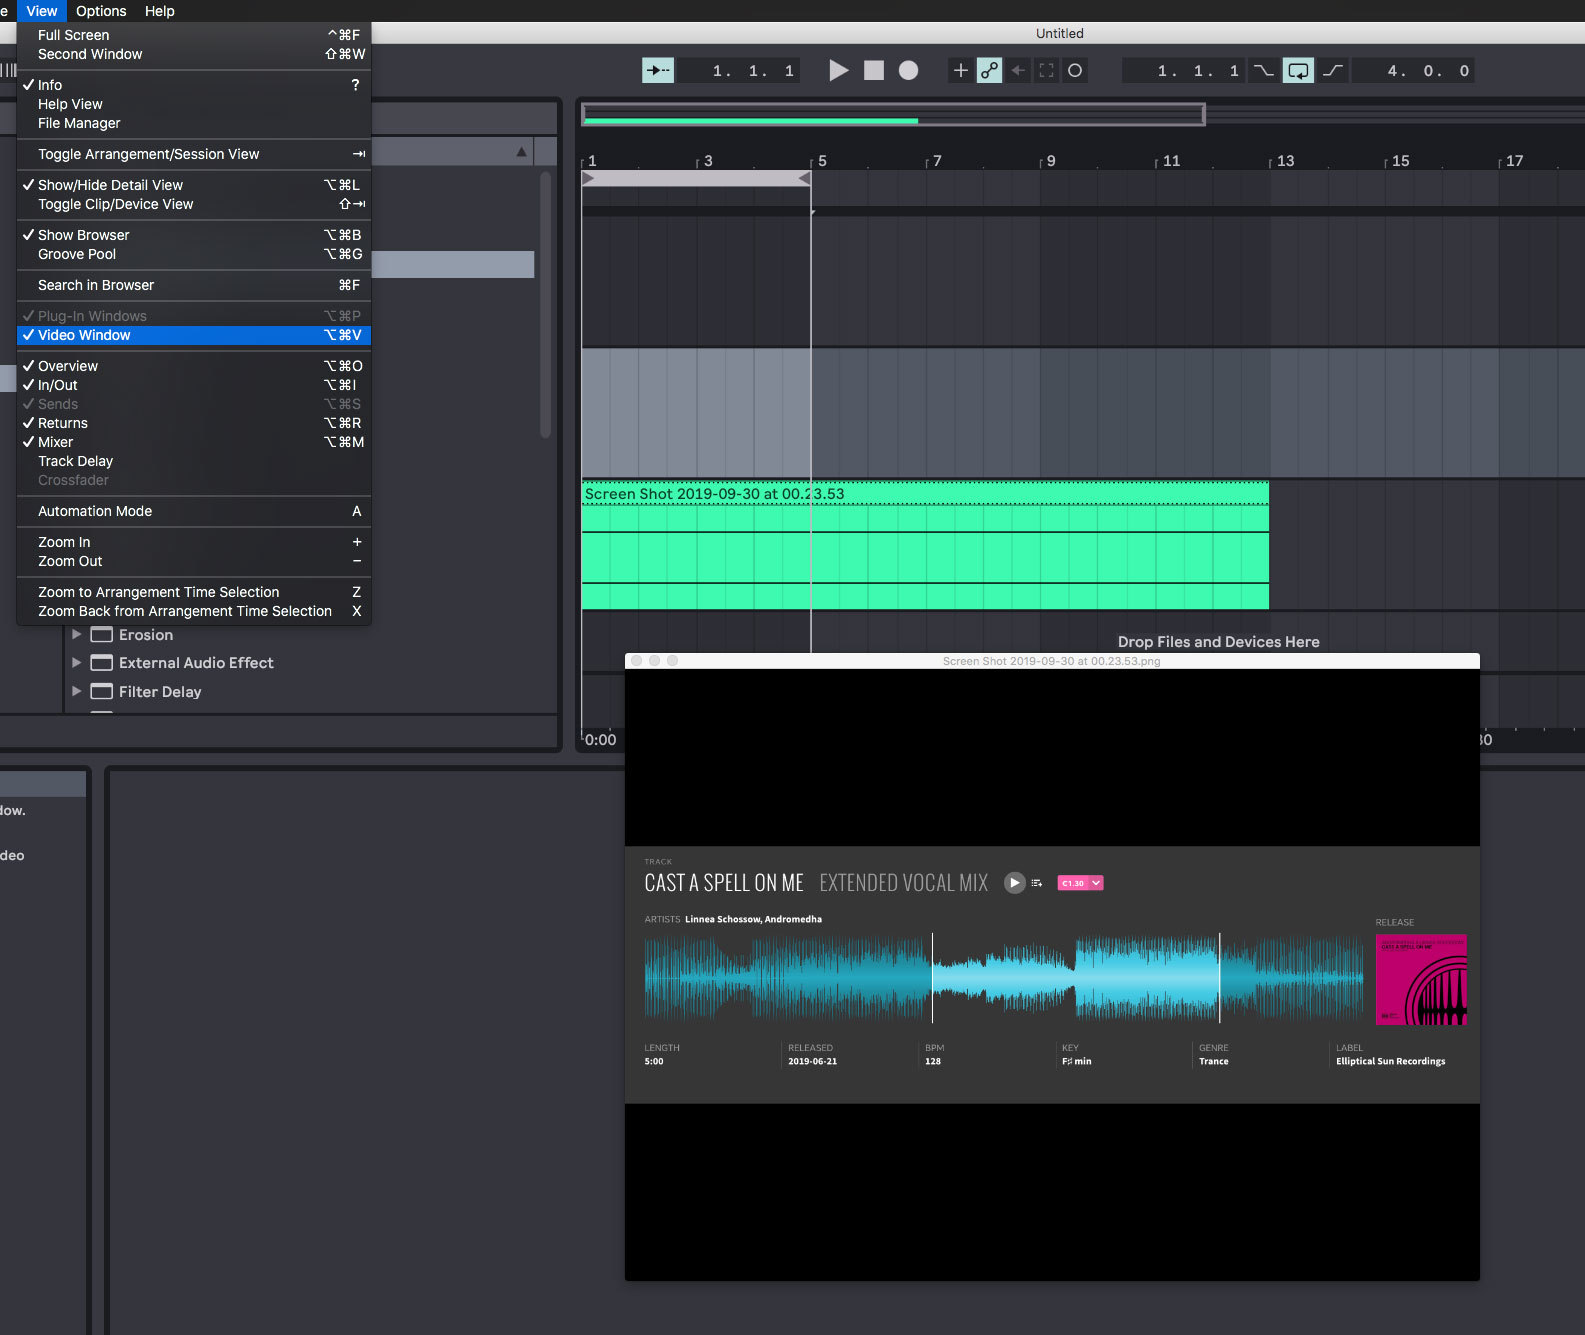
Most of the time you’ll find tempo & keys info on Beatport to get those information, take a screen shot and you could even drop the image into Live, zoom in and loop the image file across the all ref. track duration and it will show up in the video ( you can toggle on/off Live’s video window using ALT + CMD +V ).
That’s a good start & some steps to take when starting to work on a remix IMHO, you can also then save templates and the more you do it, the more you’ll learn about songs structure & arrangement.
So that’s about using Ref. Track for arrangement & structure, now for Audio & Mixing Referencing
Well first thing first obviously is to get a proper ref. track, though there’s many way to rip audio from the web, keep in mind that it’s important to have a good quality audio file for referencing. So high res. file like wav or Flac or at least high Res 320 Kbs Mp3 are the one to get. Get them from Beatport or other places where you can purchase tracks, you will also support the producers by doing so 
Now that you’ve got your Ref. Track the simplest & most convenient way to use them as reference for mixing is by using 3thrd party plugins to be honest.
One of the best one is definitely ADTPR METRIC AB from Plugin Alliance ( not cheap but really full packed with everything you need ), check Protoculture tutorial here : How To Use Metric AB with Protoculture | Tutorial 01 - Setup and Basic Operation
Another one is REFERENCE by Mastering The Mix and there’s also MAGIC AB REFERENCE from Sample Magic. You’ll find some videos on the web about those.
To use reference tracks without 3thrd party plugins, the thing to keep in mind is to have both reference track and your Mix playing back at equal levels, so it’s more easy to work inside the box with just the reference track & a version of your final mix loaded in Live. Have an overview about his there : How to A/B against commercial reference tracks in your DAW | MusicRadar
FFT analyzers, Loudness Meters and Stereo Goniometers are your plugins friends when it comes to compare tracks. The free Span from Voxengo and Flux Stereo Tools can help. Many other plugins like iZotope ( Insight2 ), Bluecat Audio or Melda Production can also be handy. Mastering the Mix LEVELS is also a good one to have.
Some of these plugins have multiple channels I/O allowing you to get visual information from several tracks inside one plugin window.
There’s also solutions outside your DAW or apps that connect to it. To compare 2 audio files you can use EXPOSE from Mastering The Mix, check S.A tutorial here : How To Use Mastering The Mix - EXPOSE with Rory Webb | Tutorial 01 - Overview
More advanced solutions like Flux Pure Analyzer ( comes in Essential & Full version ) or Nugen Audio Visualizer or Plugin Alliance SPL HawkEye are also extremely complete apps that will give you a shit load of information about your audio playback from you DAW.
Hardware solutions also exist and an affordable one is CLARITY M STEREO by TC Electronics but you have to make sure that you can connect it to your audio interface, it’s using a break down cable or Stereo Optical Input for TOSLink, though you can also connect it via USB and use the plugin that comes with it.
https://www.tcelectronic.com/Categories/Tcelectronic/Signal-Processors/Meters/CLARITY-M-STEREO/p/P0DC8#googtrans(en|en)
OK, that’s a round up of analysis tools & solution when it comes to referencing & visualizing audio, I guess.
But to stick to the essential, referencing a track means comparing it to your mix at an equal playback level and look to match the full FFT spectrum, Loudness & Tonal balance and stereo image. So if you don’t have a third party solution, you can always use free tools on each track and compare it with your final mix. But that’s really where apps like AB Metric, Magic A/B & Reference shine, it makes this really convenient and you can work inside your remix session as opposed to have to render a final version first.
Sorry for the long post , but well, you’ve got some info in there, hope it will be useful.
Final words would be about taking part into Remix Competition, either here on S.A or outside, try to approach it as a learning experience and a way to challenge yourself, do not focus on the “winning price” and take it easy. If you spend too much time & effort on a remix and expect to win something, it"s likely gonna be deceptive when that doesn’t happen. Meanwhile you would have spend time on remixing others music, perhaps ending up frustrated and not working on your own production instead. It’s just a good way to learn & practice, don’t picture it like the Holy Grail of Music Production learning & success
And talking about Holy Grail always remember to …
Cheers !


")